Electronics from Scratch
any% speedrun

For my DIY bio lab project I have been building components like syringe pumps and heat plates from scratch which has forced me to learn enough electronics that I can wire things up without electrocuting myself.
I’ve written a simple guide with video on how to get productive with electronics as fast as possible. Between this and ChatGPT, I think you can easily know everything you need to work on an interesting project in a weekend, even assuming zero coding or existing electronics knowledge.
I’ll tell you what to buy, teach you basic electronics and programming through six mini projects, then show you how to use AI to plan and buy parts for more complicated projects.
Equipment
The first thing you need is a basic starter kit. Something that looks like this picture.

I suggest buying a minimalist one because these kits typically contain a bunch of components you will never use. To learn the fundamentals of electronics make sure you get the following components (I included example Amazon links at the end):
1. ESP32

The ESP32 is a cheap ~$5 microcontroller (small computer) that can control and read data from hardware components connected to its pins. Programming them is easy, and we’ll use an AI programming environment to make it even easier. Note that there are many variations of the ESP32 board. I bought the ESP32 WROOM-32 30 pin version with a USB type C power source. You can buy starter kits that come with a microcontroller board or just the components by themselves.
2. LEDs, buttons, a potentiometer and 220 Ohm resistors

More involved projects build off of the simple exercises you can do with these parts. As mentioned above, you can buy starter kits that include all of them at once.
3. Male to male jumper wires

These are used to connect the ESP32’s pins to your components to create circuits. They will be included in most starter kits.
4. A breadboard

This is a rectangular board with slots for jumper wires and components. Every starter kit will include one of these.
5. Breakout Board

An annoying thing about most breadboards is that when the ESP32 is inserted you can only access one row of pins along the side. The breakout board lets you easily plug jumper wires into the slots around the full perimeter of the board. Make sure you buy a breakout board for an ESP32 with the correct number of pins (eg. 30 pins). Note that this generally doesn’t come with most starter kits. You will likely need to order it separately.
Example Amazon Links
Total cost: ~24 GBP
Practical Guide
Here are six projects that require hardly any components but teach you the widest range of useful concepts. For the first three projects, this is the workflow I suggest copying and pasting this prompt into an LLM followed by the project title and goal:
“You are a tutor that always responds in the Socratic style. You *never* give me the answer, but always try to just ask the right question to get me to learn and think for myself. You should break down the problem into simple parts. *Ask one question at a time.* Never give me the answer. I have access to an ESP32, breadboard and a basic electronics starter kit.”
The AI will guide you through the project while getting you to work out the answers for yourself. This is more effective than just being directly given the answer.
Here’s a quick video showing what I mean:
Project 1: Basic LED Circuit
Goal: Create a circuit to turn on an LED. No GPIO pins, just a basic circuit.
Project 2: LED with Button
Goal: Create a circuit to turn on an LED when a button is pressed. No GPIO pins, just a basic circuit.
For the next project, try to look up the component online - search something like “potentiometer pinout” to figure out what role each pin plays. If there’s a name or identifier on your specific potentiometer try including that in the search query to get better results.
Project 3: LED with potentiometer
Goal: Create a dimmable LED using a potentiometer. No GPIO pins, just a basic circuit.
That’s the first three projects done! Consider doing them once more from memory to double check you understood them.
Now you are ready to start working on some projects involving programming. Instead of using the 3V3 pin, which outputs a constant voltage, you will use GPIO (general purpose input/output) pins that allow you to programmatically control the voltage, letting you control components like LEDs through code.
Coding Setup
We’ll use a programming language called C++ with a framework called PlatformIO to write code for the ESP32 (I tried alternatives, they all sucked). If you don’t know how to program, don’t panic, AI will help you bridge the gap.
Download and sign up for Cursor. Cursor is an AI code editor with a free two week trial. It’s the development environment that many professional software developers are switching to.
Install the PlatformIO extension
Wait for things to install
Here’s a short video showing the setup process:
And another video showing the workflow:
Project 4: LED Blinker
Goal: Use an ESP32 to blink an LED.
For the final two projects, I prepared some code you can copy to quickly add a web socket server to any ESP32 project. Web sockets allow you to communicate back and forth seamlessly between your laptop and your ESP32 through WiFi. Please see this video to understand how it works.
Here is the link to the web server template code.
Project 5: ESP32 WiFi LED controller
Goal: Use ESP32 to run a web socket server. Connect to the server from a web browser and click a button to turn an LED on and off.
Project 6: ESP32 WiFi LED Slider
Goal: Connect to the server from a web browser and slide a range slider to control the brightness of an LED.
That’s really all you need to know to be productive! You can probably already think of your own simple projects to extend these basic ones. The only additional skill you need is to lookup the data sheets / online guides for parts you buy which will explain how they should be wired up, power supply requirements etc.
Planning Projects and Sourcing Parts
Given an idea for something you want to build, the first thing you’ll want to do is to plan it out with GPT. Question all of the components and make sure you understand the purpose behind everything GPT tells you to buy.

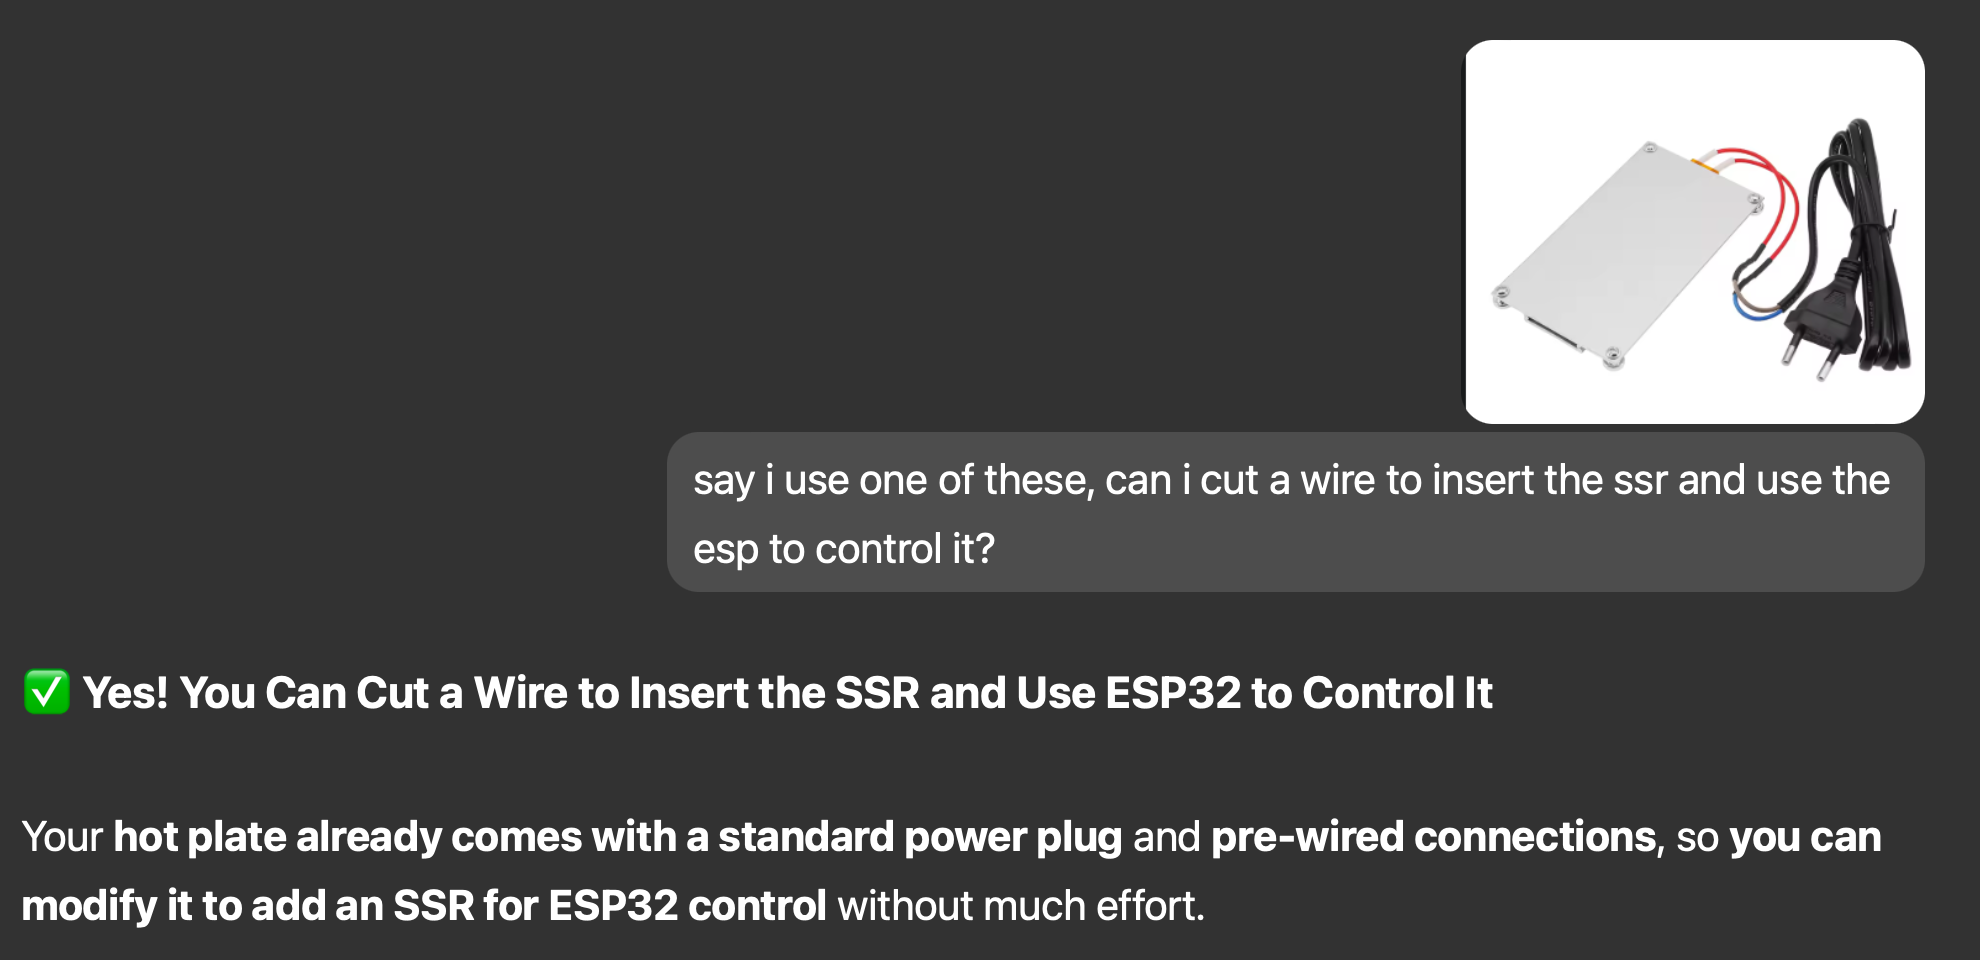
When buying parts, remember that you can always screenshot the product page of a part you want to order and get GPT to double check whether it’s correct according to your plan. Sometimes it’s really hard to tell by yourself, especially for parts with inscrutable names.
And of course when wiring things together, you can get GPT to check the wiring is correct:

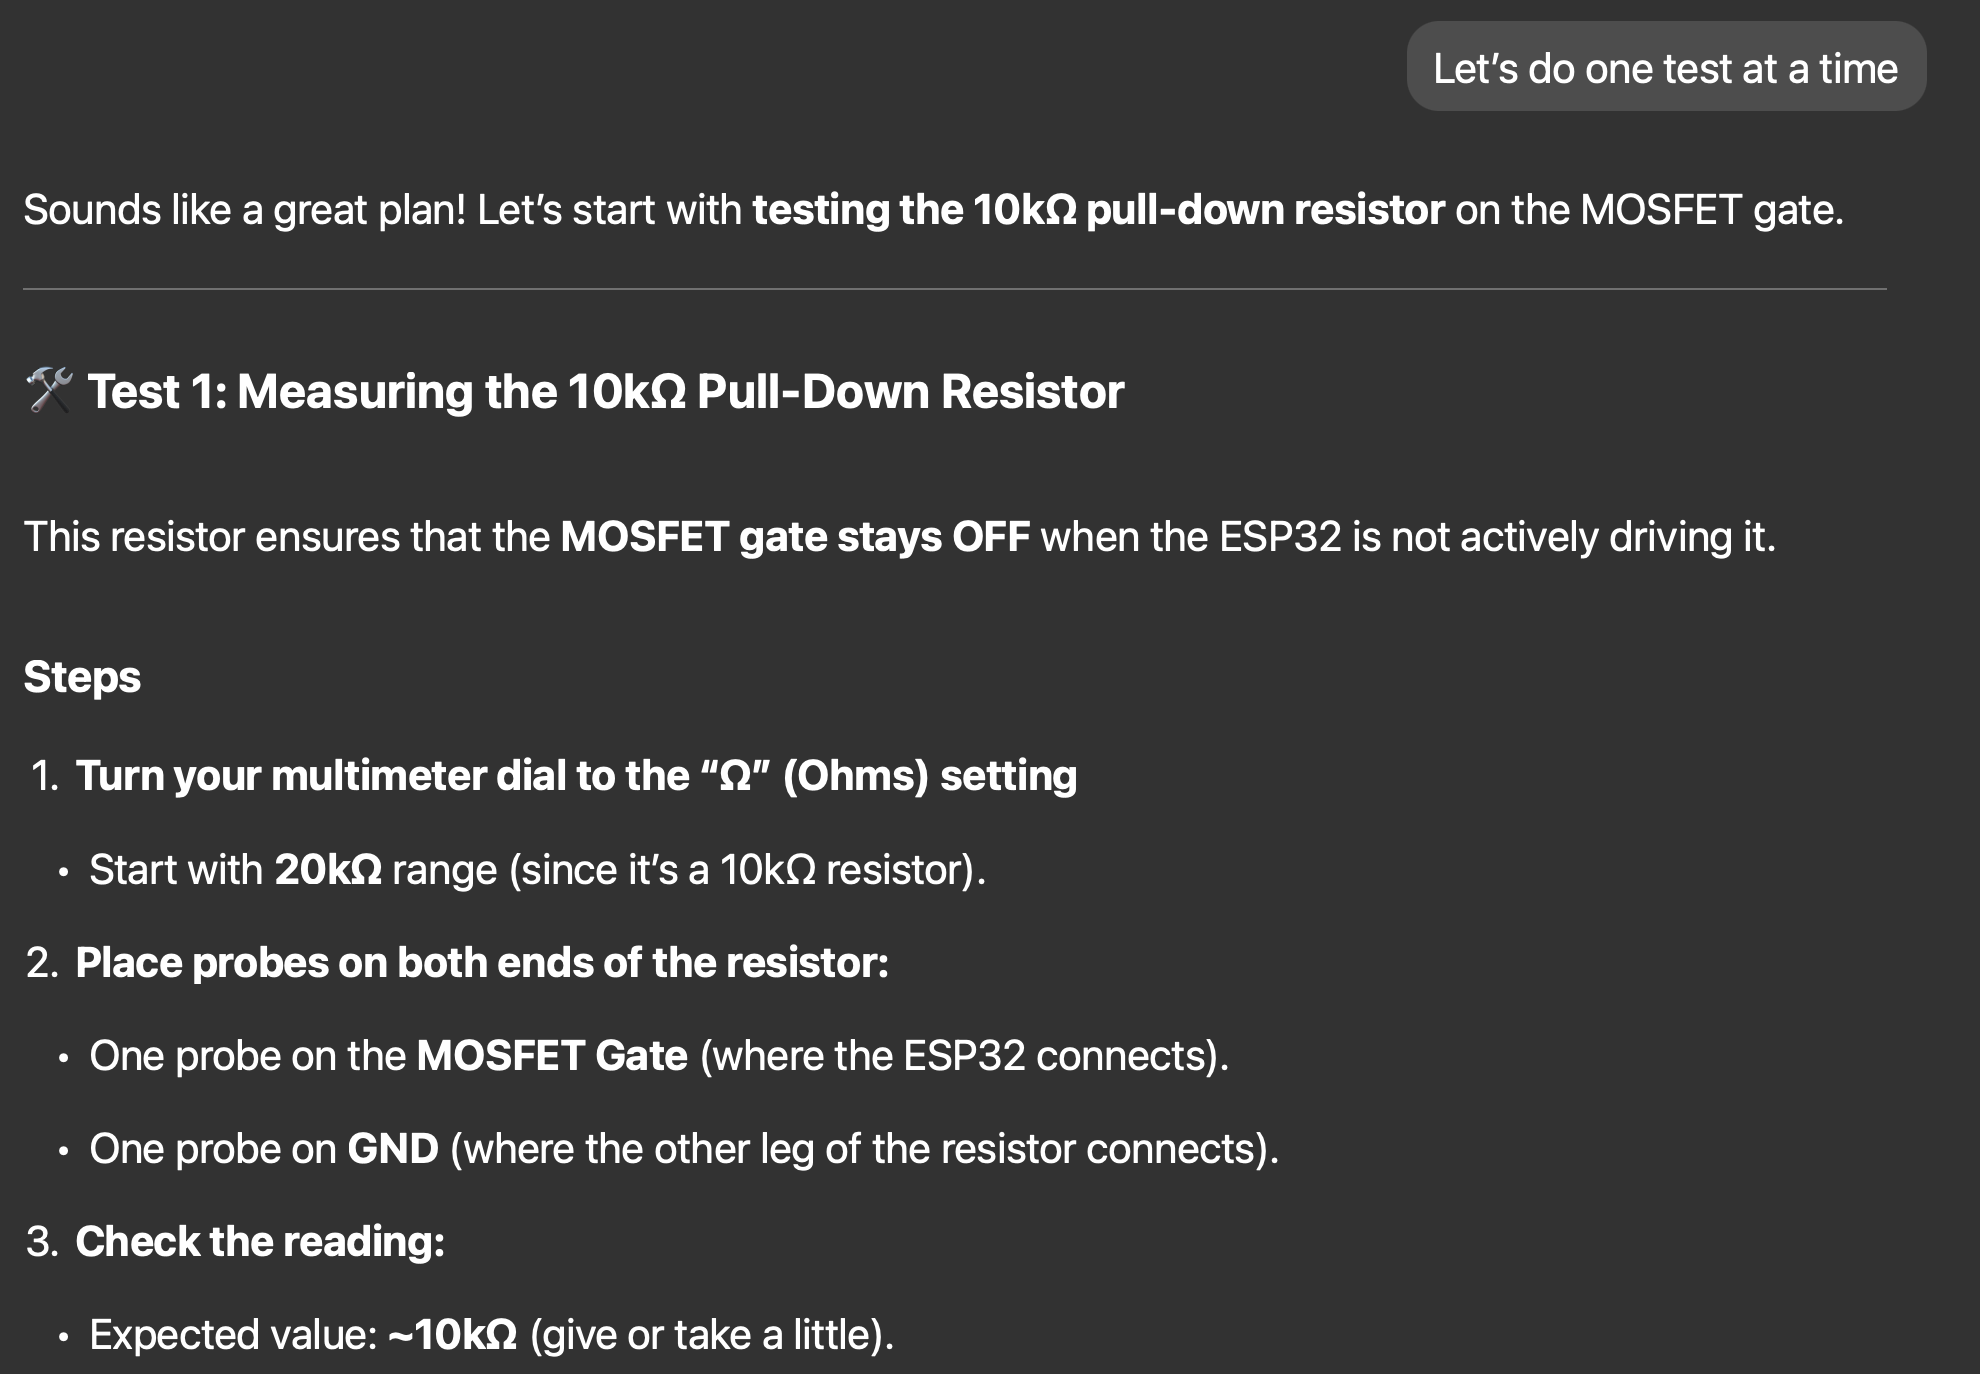
And it can suggest ways to check the circuit is correct with a multimeter before you turn it on:
In terms of places to buy from, Amazon is the most expensive but has the fastest shipping. You generally don’t need to worry about bundling everything into one order to hit a free shipping limit.
AliExpress (Chinese version of Amazon) has a good balance between price and shipping times. In the UK you only need to spend 8 pounds to get free shipping. Things seem to take 1-2 weeks to arrive. This is where I would aim to buy most of your kit to keep costs down.
Alibaba caters more towards businesses. I personally haven’t used it yet. The shipping times seem to be longer and there are minimum order quantities, but if you are buying in bulk it’s the cheapest option - 10-100x cheaper than Amazon depending on what you’re buying.
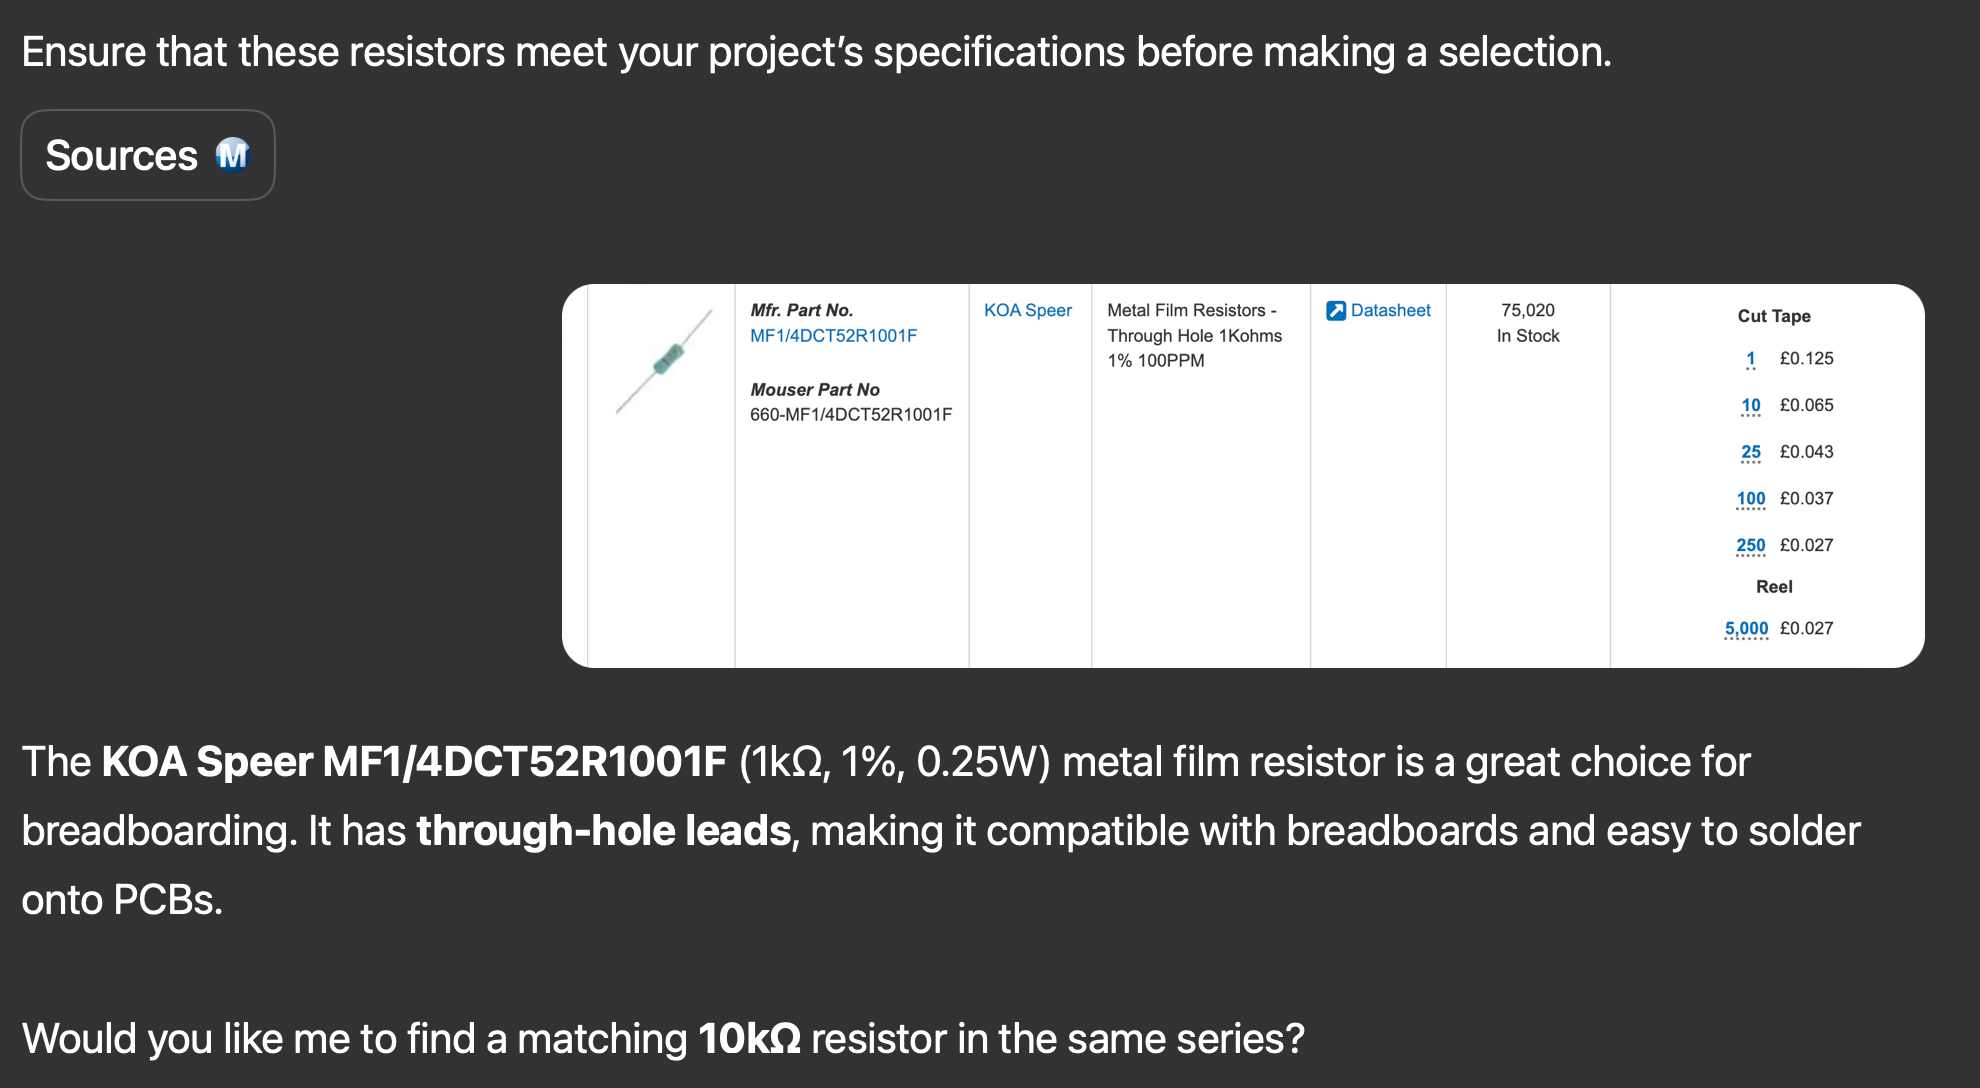
For components like resistors, diodes, MOSFETs and other generic circuit components I used Mouser. People also recommend DigiKey. Both of them have a 33 GBP minimum spend to hit the free shipping price so you should probably try to bundle as many orders as possible into one basket. I found Mouser’s UI to be confusing as hell. I heavily relied on AI to order these parts which worked fine - everything I ordered works perfectly so far.
Next Steps
If you enjoyed this, you should know that I started a little group in London to work on hardware and electronics projects like this. Read this, and send me a message if interested! Here’s what you can expect: